
Tonight’s list, then the legend — then the street
You are learning a method, not one node
Every night and every market is different. Charter / Spectrum evolution prints, FBR / Next Solutions assignments, and AM103-class design maps all use the same sequence: what you got, where it is, what to do there.
Open tonight’s Network Evolution sheet first. Write the node, your tag IDs (NODE-AMP# — underscore allowed, e.g. AM071_04), and the job count. Ignore other crews until you can say out loud: “I have these tags on this node.” If you cannot, you are not ready to hunt streets.
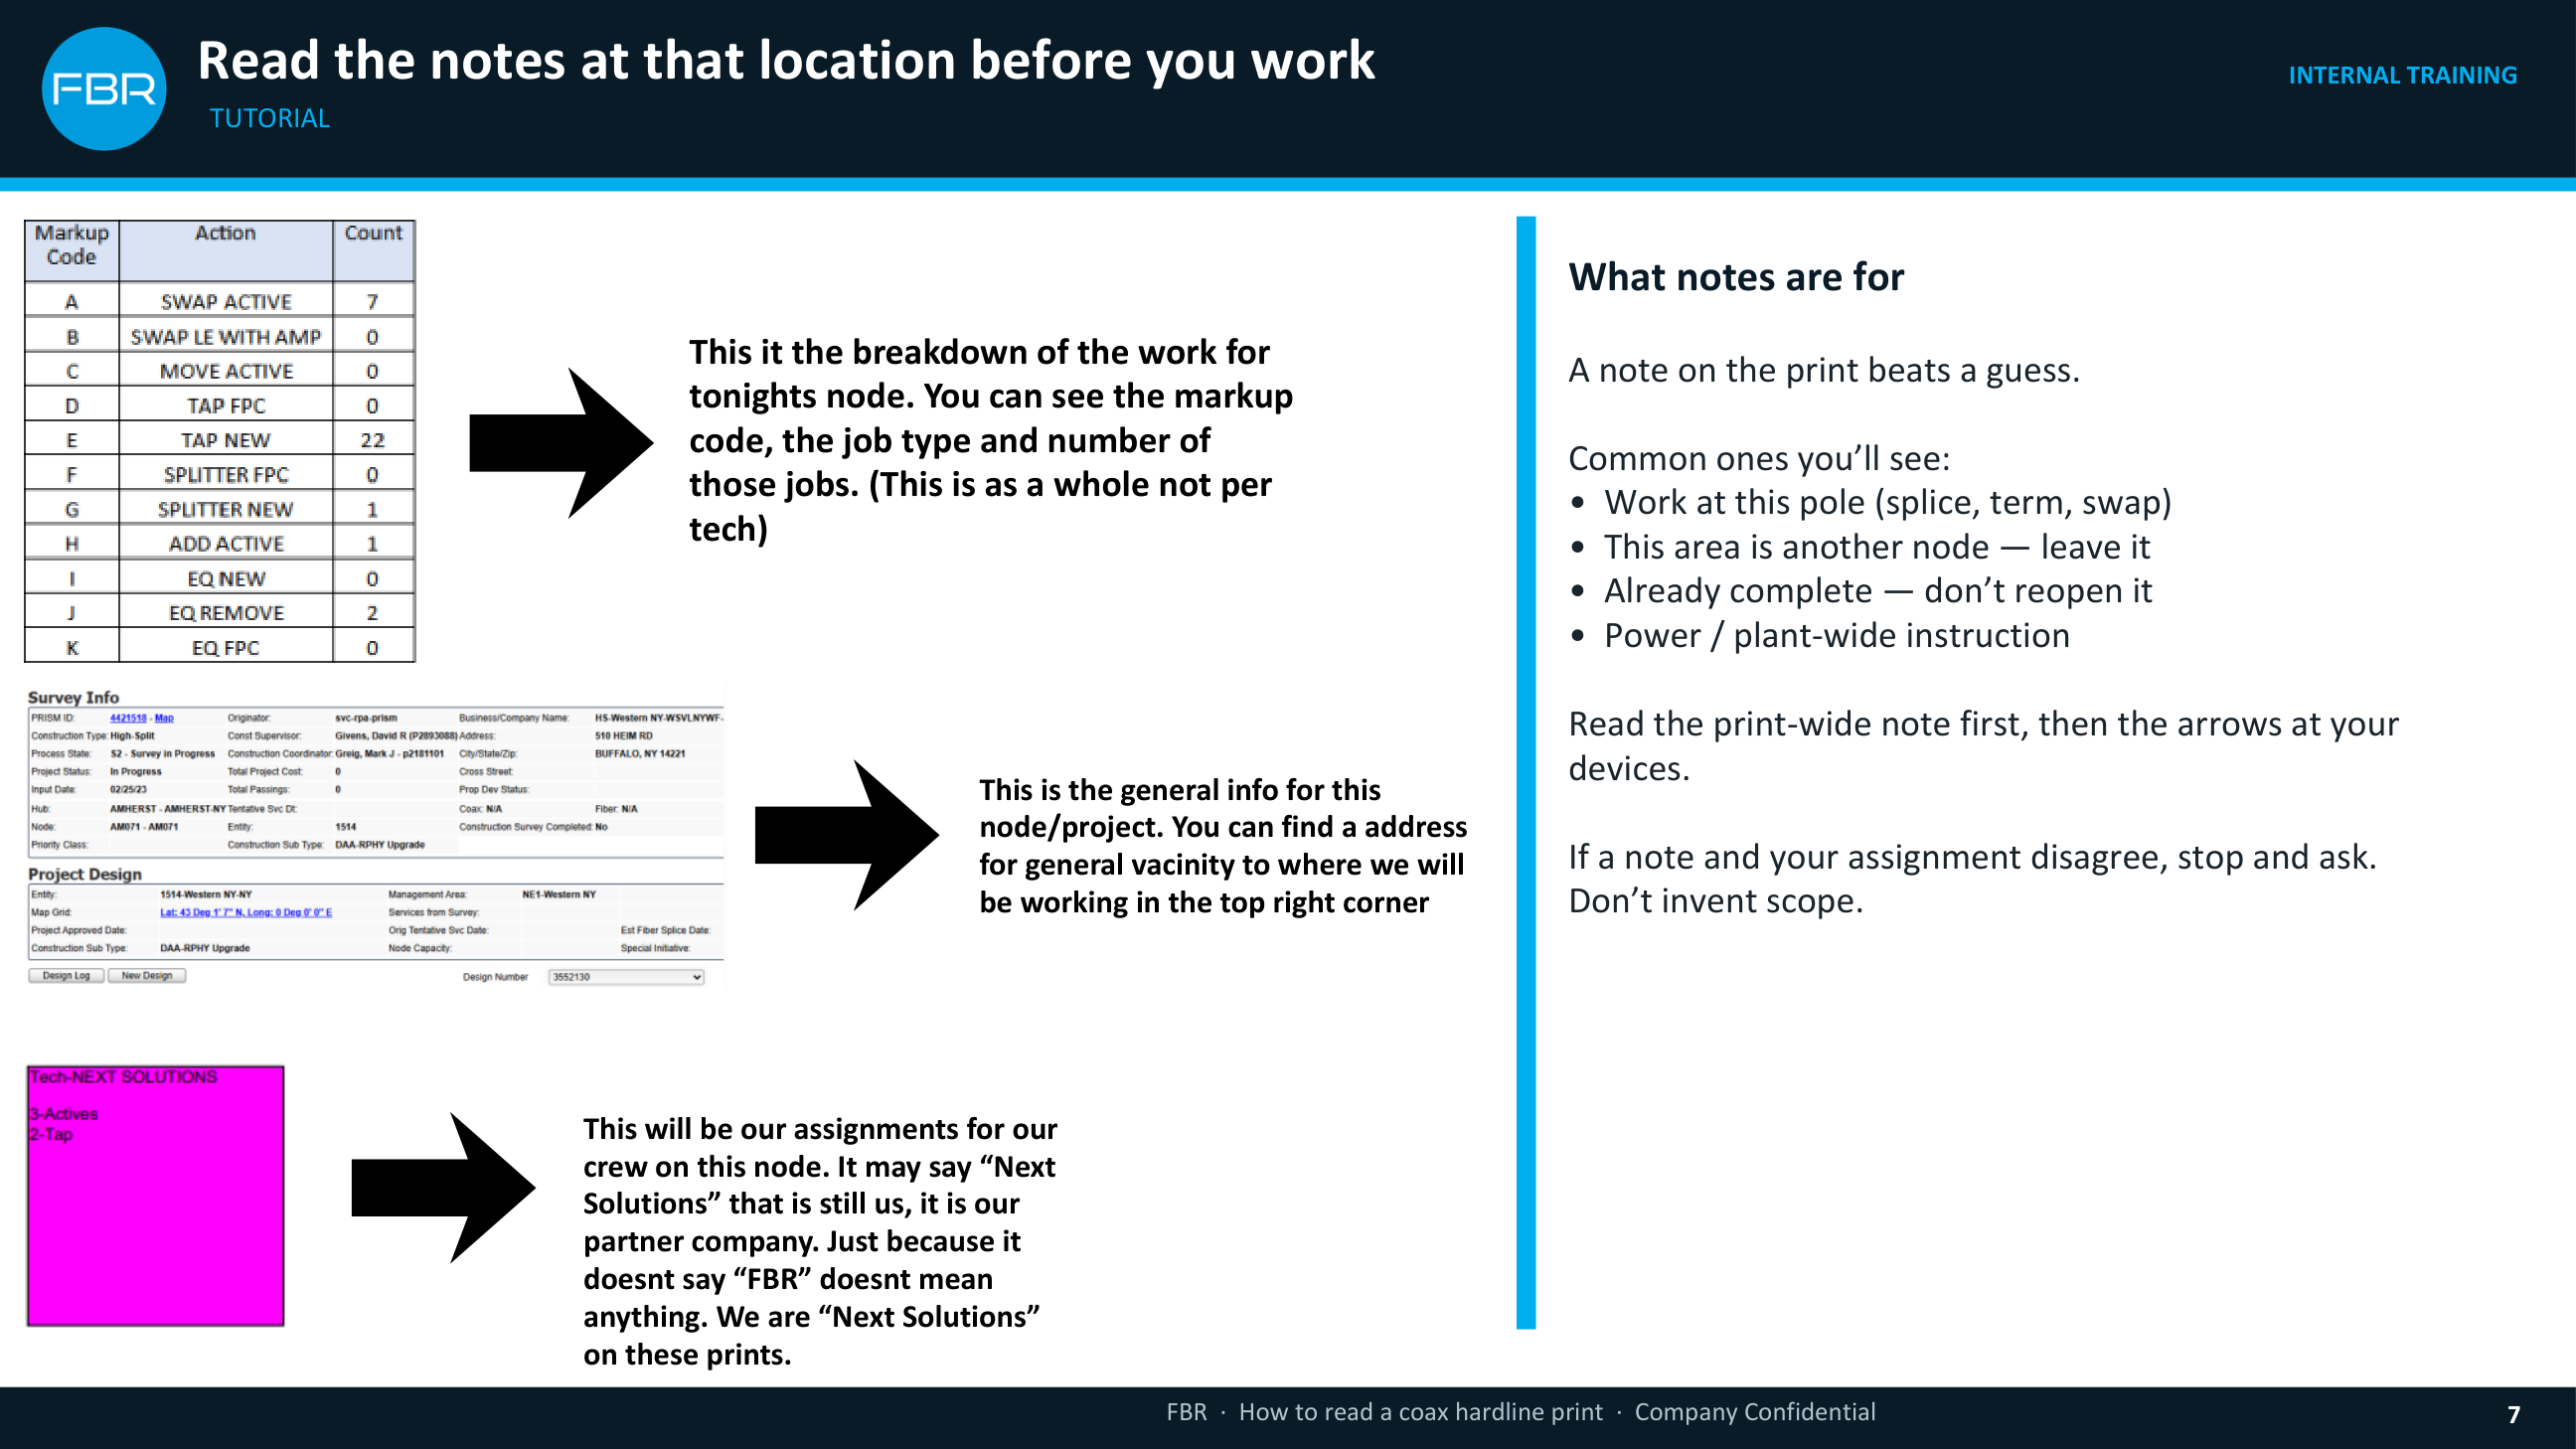
Next Solutions on a color box is still us — our partner name on evolution prints. It does not mean a different company owns that work.
Three steps. Same every night. The node changes — the method does not.
01
What you got
Pull tonight’s assignment first — node, amp IDs, tag numbers, and job counts. Ignore other crews until you know yours.
02
Where it is
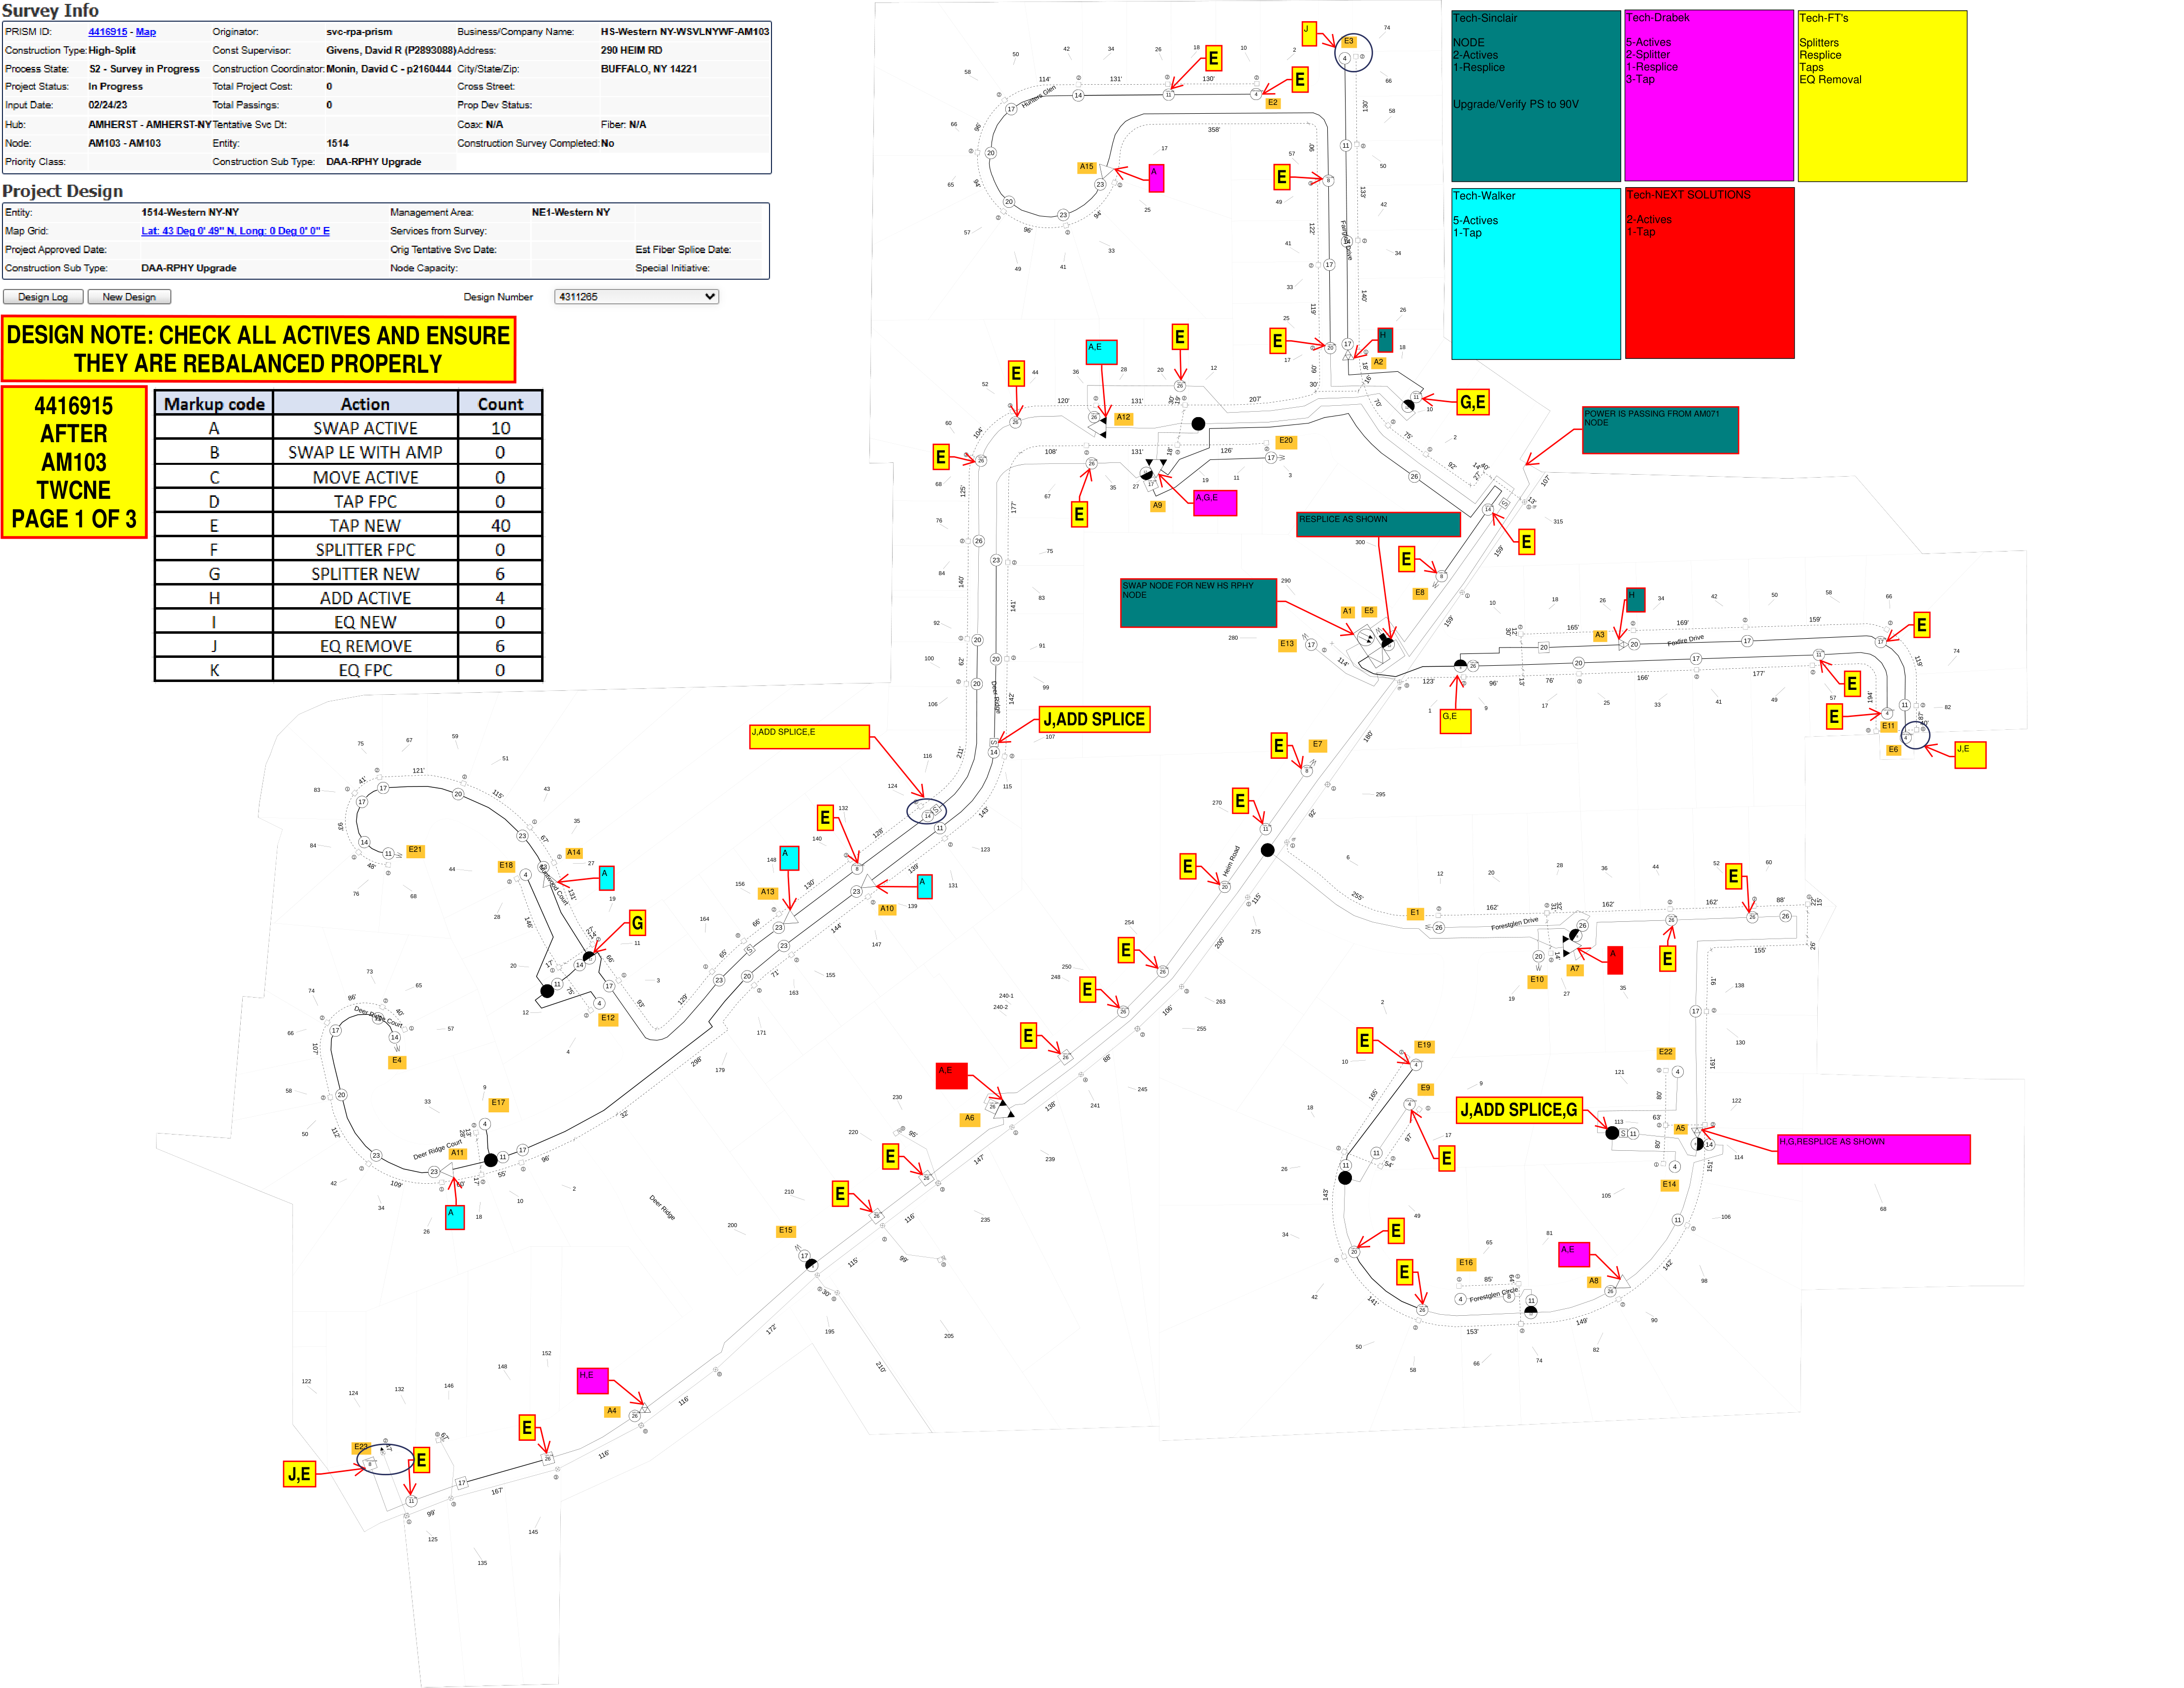
Open the matching print, use the legend, find the street, then the house number, then the device tag on strand.
03
What to do
Read notes and work letters at that spot. Do only what is on your list — if sheet and print disagree, stop and ask.
Stop. Call a supervisor. Do not invent scope, do not work another crew’s letters, and do not assume last night’s node is tonight’s file.
Legend — letters, hardware marks, and linework
Work letters — yellow box, red outline
Match letters to tonight’s assignment before you hunt streets. More than one letter means more than one job at that spot.
- A
Swap the active
Internal guts swap if housing supports it; otherwise cut and replace.
- B
Swap LE w/ AMP
Replace existing LE with a new amp at the same location.
- C
Move active
Relocate active to new location; replace path with splice as shown.
- D
Tap swap faceplate
Replace tap faceplate — no splicing unless print says otherwise.
- E
Add new tap
Install new tap; number in circle is tap value (dB).
- F
Splitter faceplate swap
Swap splitter faceplate like a tap style change — no splice.
- G
Add new splitter
Install new splitter at marked location; match power/signal flow.
- H
Add new active
Add LE/MB/amp at marked location.
- I
Add new EQ
Add equalizer at marked location (less common on high-split jobs).
- J
Remove EQ
Remove EQ; print may show jumper left in place.
Hardware marks on the line
Same meaning every market. Drawing style can vary a little — the mark does not.
Pole
Circle with an X. Strand hangs here. This is a location — not a tap.
Tap
Circle or square with a number. That number is tap value in dB — not the house and not the pole ID. Shape usually tracks tap style / port count.
Amplifier (bridger)
Triangle with filled corners = output legs. Bridger / mini-bridger. Not a splitter.
Line extender
Open triangle — still an amplifier, usually one output on trunk.
Pedestal / flowerpot
Square on the ground. Underground access — common on rear easements.
Splice
Box marked S (sometimes S 14). Hardline is joined here. Notes may say add / resplice.
Terminator
Filled circle. Caps a dead-end or unused port. Notes may say ADD TERM.
Empty circle
Pole or simple junction. Do not treat it as a tap unless a value is inside.
DC8 / power step
Half-filled circle, often with an 8. Power passing or step-down. Only your job if assigned.
Power supply
You may see 90V, amps, or a node ID. Plant power — only if it is on tonight’s list.
Active + tap
Housing-to-housing: LE/MB plus a tap. The number (23 here) is the tap value you must install.
Work letters
Yellow box, red outline on the device. Read the whole string (A,E = both). If it is not on your assignment, you still do not work it.
Lines and numbers
- Thick line
- Hardline along the street — the coax you splice.
- Thin line / tick
- Drop or service to a lot — not mainline work.
- 142′
- Footage to the next device. Not an address.
- Gray 51 in the lot
- House number. Park here, walk to the device.
- A6 / A7 tag
- Location tag. Match tonight’s NODE-AMP# to this tag.
- NOTE + arrow
- Read before you open anything. Can say stop, splice, or leave it.
- Heavy colored line
- Node boundary. Do not cross unless that node is yours.